

Playbook end-to-end per lo sviluppo di prodotti IoT – Fase 2: Architettura di sistema
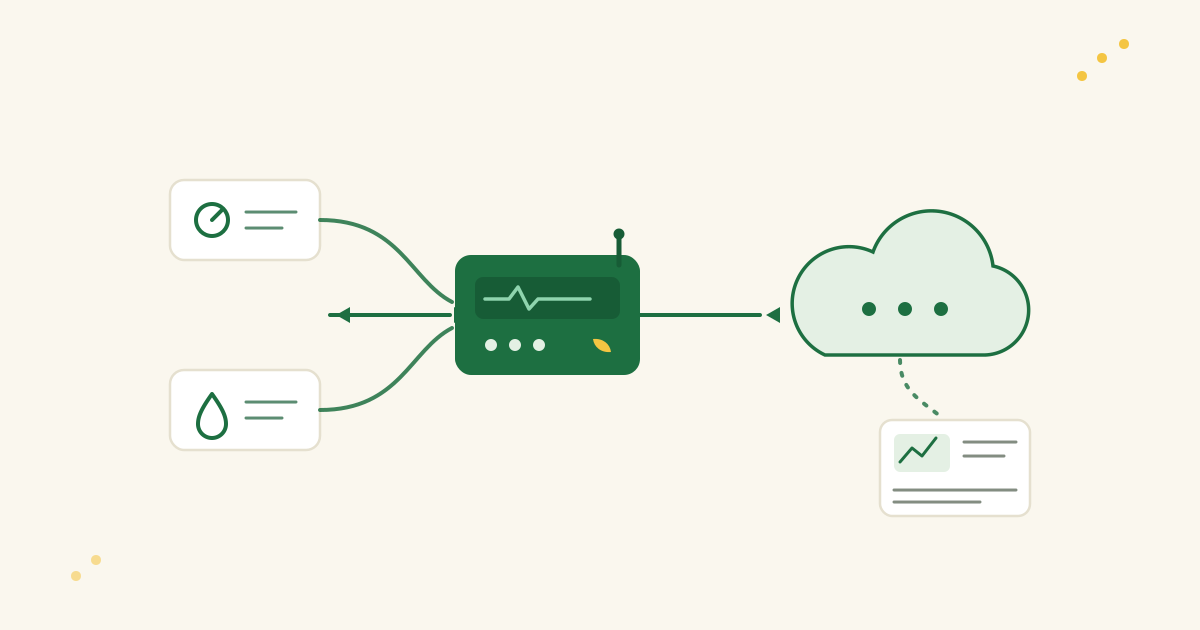
Pianificare su carta prima di costruire
Clicca per la sezione precedente: Fase 1
Le decisioni di architettura sono le più economiche da prendere e le più costose da sbagliare — ed è per questo che la Fase 2 avviene su carta. Con requisiti solidi in mano dalla Fase 1, è qui che create il piano ad alto livello per soddisfarli. Pensate all’architettura di sistema come al progettare una città prima di costruire case o strade: decidete dove vanno autostrade e ponti prima di colare il cemento. In un progetto IoT, significa abbozzare il sistema complessivo su carta o su una lavagna (va bene anche la “carta” digitale) prima di qualsiasi saldatura o riga di codice. Questa fase riguarda il pensiero d’insieme — prendere ora le decisioni chiave che daranno forma al design dopo. Alla fine della Fase 2, avrete un progetto chiaro per il vostro prodotto IoT, e i progetti costano molto meno da cambiare rispetto ai circuiti stampati.
Visualizzare l’intero sistema con un block diagram
Il primo passo è disegnare un block diagram dell’intero sistema — la planimetria di un architect per il vostro dispositivo IoT e il suo ecosistema. Abbozzate tutti i componenti principali e mostrate come si collegano e comunicano. Un semplice block diagram IoT potrebbe assomigliare a questo:
- Sensore → Microcontrollore (MCU/SoC) → Radio wireless → Cloud server → App web/mobile (client)
Questa catena è il data path end-to-end. Il sensore raccoglie i dati e li alimenta all’MCU. Il microcontrollore può fare un po’ di elaborazione, poi usa una radio wireless (Wi-Fi, Bluetooth, LoRa, ecc.) per inviare i dati a un cloud server. Il server archivia o analizza i dati e li rende disponibili a un’interfaccia utente — una dashboard web o un’app mobile. Con il flusso tracciato, tutti nel team possono vedere tutti i pezzi a colpo d’occhio e capire come i dati viaggiano attraverso il sistema.
Non preoccupatevi delle abilità artistiche — semplici scatole e frecce bastano. L’obiettivo è la chiarezza. Il block diagram è la mappa d’insieme della vostra “città” IoT: mostra i componenti principali e come interagiscono, e previene malintesi come una persona che assume che il dispositivo parli direttamente con un’app sul telefono mentre voi intendevate farlo passare attraverso una cloud API. Quando tutti vedono la stessa mappa, meno persone si perdono dopo.
Decisioni di partizionamento: chi fa cosa (e dove)?
Con il sistema disegnato, il passo successivo è il partizionamento — decidere quali responsabilità vivono dove. Chi fa cosa: quali compiti appartengono all’hardware/dispositivo, quali al firmware e quali al lato cloud o server. Queste decisioni influenzano prestazioni, costo, complessità e sicurezza.
Alcuni esempi di decisioni di partizionamento in un sistema IoT:
- Elaborazione dei dati: I dati grezzi del sensore dovrebbero essere elaborati o filtrati sul dispositivo, o inviati grezzi al cloud per l’elaborazione pesante? L’elaborazione on-device riduce banda e carico sul cloud, ma richiede un MCU più potente e può consumare più batteria. Inviare dati grezzi mantiene il dispositivo più semplice, ma il backend deve essere robusto e il link dati ha bisogno di banda sufficiente.
- Sicurezza dei dati: Cifrerete o comprimerete i dati sul dispositivo prima dell’invio, o gestirete tutto nel cloud? Cifrare sul dispositivo protegge i dati dal momento in cui lasciano il sensore, ma richiede di più all’MCU. Farlo nel cloud mantiene il dispositivo più semplice, ma i dati viaggiano non protetti per un tratto — inaccettabile in applicazioni sensibili.
- Storage e intelligenza: Se la connessione cloud cade, il dispositivo si limita a bufferizzare i dati localmente — o prende persino decisioni locali? Può operare in modalità “degradata” senza il cloud? Deciderlo ora influenza se vi servono memoria o storage extra sul dispositivo, o logica extra per gli scenari offline.
Il partizionamento è un equilibrio: ogni parte del sistema dovrebbe gestire ciò che sa fare meglio. Un piccolo sensore a batteria è bravo a raccogliere dati e fare elaborazione leggera; il number-crunching pesante appartiene a un cloud server con potenza da vendere. Viceversa, se l’applicazione richiede risposte molto rapide o deve funzionare senza internet, più intelligenza si sposta all’edge. Non c’è una risposta valida per tutti — i compromessi derivano dai vostri requisiti della Fase 1.
Iterare su queste scelte è completamente normale. Potreste partire con “il nostro dispositivo farà tutto — pre-elaborazione, cifratura, decision-making” e poi accorgervi che l’MCU scelto non regge il carico di lavoro, o che la sua memoria è troppo piccola. Quell’intuizione potrebbe spostare compiti sul cloud. O l’inverso: elaborazione pianificata per il cloud si sposta sul dispositivo perché la latenza di rete è un problema. Intercettare questi problemi su carta costa molto meno che scoprirli dopo aver scritto il codice o fabbricato un PCB che non può supportare il firmware. Prendetevi il tempo per dividere bene le responsabilità.
Selezione delle tecnologie: scegliere gli strumenti giusti per ogni parte
Con block diagram e partizionamento a posto, è il momento della selezione delle tecnologie: decidere le tecnologie o i componenti effettivi per ogni blocco — o almeno restringere le opzioni. Pensatelo come scegliere i materiali per ogni parte di un edificio: telaio in acciaio o legno, pareti in mattoni o cemento. In termini IoT, le considerazioni chiave includono:
- Sensori: Di quale sensore (o quali sensori) avete bisogno? Deriva dai requisiti. Letture di temperatura ad alta precisione potrebbero richiedere un sensore di temperatura digitale con interfaccia I²C; un semplice rilevatore di soglia potrebbe andare bene con un sensore analogico e un ADC. Considerate accuratezza, consumo energetico, costo e facilità di interfacciamento con l’MCU.
- Microcontrollore (MCU) o System-on-Chip: Scegliete il cervello del dispositivo. Deve essere ultra-low-power (per funzionare anni con una cella a bottone)? Ha bisogno di potenza di calcolo o memoria (per elaborazione on-device, machine learning o sensori multipli)? E l’ecosistema — un vendor preferito, o strumenti di sviluppo specifici? Potreste restringere a: “Probabilmente un MCU della famiglia ARM Cortex-M4 — CPU decente e floating-point per i calcoli sui sensori, con modalità low-power per il funzionamento a batteria.”
- Connettività (radio wireless): Selezionate come il dispositivo comunica, in base a portata, potenza ed esigenze di dati. Per un wearable che parla con uno smartphone, Bluetooth Low Energy (BLE) si adatta bene. Per un gadget domestico con Wi-Fi disponibile, il Wi-Fi è comodo per la connettività cloud. Per dispositivi remoti o wide-area, considerate l’IoT cellulare (LTE-M, NB-IoT) o radio a lungo raggio in banda non licenziata come LoRa o Sigfox per esigenze di bassa banda e lungo raggio. Ognuna ha compromessi: Wi-Fi e cellulare danno accesso a internet ma consumano di più; BLE è low-power ma a corto raggio; LoRa è a lungo raggio e low-power ma solo per piccoli pacchetti.
- Fonte di alimentazione: Come è alimentato il dispositivo? Se è a batteria, quella scelta plasma tutto il resto. Una cella a bottone richiede componenti ultra-low-power a tutti i livelli — MCU, radio, persino il sensore — e funzionalità di power management come sleep mode o un protocollo di comunicazione efficiente. L’alimentazione di rete vi dà libertà di usare Wi-Fi energivoro o un processore più forte. Considerate anche il tipo di batteria (lithium-ion ricaricabile vs sostituibile) e l’eventuale circuito di ricarica.
- Altri componenti: A seconda del sistema, ci possono essere altre selezioni: display o hardware UI (LED, schermi, pulsanti), attuatori (motori, relè). Non servono ancora le part number finali per tutto, ma dovreste avere una lista corta di candidati probabili per ogni componente principale.
Selezionare le tecnologie nella fase di architettura mantiene i pezzi compatibili tra loro e con i requisiti, e consente controlli approssimativi di costo e fattibilità. Se “probabilmente” vi serve un MCU di fascia alta e una specifica radio a lungo raggio, potete verificare che il costo combinato rientri nel budget e che le parti possano lavorare insieme (interfacce giuste? supporto dei driver?). Potreste scoprire che un modulo radio che vi piace si accoppia solo con una certa famiglia di MCU o richiede un MCU esterno — bene saperlo ora.
Inoltre tenete a mente potenza e dimensioni. Un dispositivo minuscolo alimentato a batteria (un wearable, un sensore remoto) può imporre un system-on-chip che integra MCU + radio per risparmiare spazio ed energia. Un dispositivo molto sensibile al costo potrebbe favorire un modulo all-in-one che combina sensore, MCU e radio. Questa è la fase in cui giostrare queste opzioni su carta e vedere quale stack si adatta meglio al progetto.
Analisi di rischi e costi: identificare presto le possibili trappole
Anche in questa fase, un buon architect inizia a elencare rischi e costi legati al design scelto. Segnalarli ora batte scoprirli dopo. Cose da considerare:
- Disponibilità dei componenti e lead time: Il design si basa su un componente che potrebbe essere difficile da reperire? È comune trovare il chip “perfetto” e poi scoprire che ha un lead time di 30 settimane o è perennemente esaurito. Un sensore all’avanguardia potrebbe soddisfare ogni specifica ma essere così nuovo che la fornitura è limitata. Identificate presto questi componenti e preparate alternative o piani di approvvigionamento. Lo stesso vale per i componenti single-source — un fornitore, un punto di fallimento.
- Driver di costo: Scansionate il block diagram e la BOM approssimativa alla ricerca di elementi costosi. Un MCU di fascia alta o un modulo cellulare può dominare il costo; il business case lo permette? Se no, riconsiderate ora. Anche il volume conta: 2 $ in più per dispositivo vanno bene per 10 prototipi ma pesano su 100.000 unità. Aggiustate l’architettura se necessario — magari l’MCU con 1MB di flash non è necessario se 256KB più un po’ di elaborazione in più sul cloud bastano.
- Single point of failure: Pensate all’affidabilità. L’intero sistema si rompe se un componente fallisce o va offline? Se il dispositivo perde la connettività cloud, diventa inutile? Se sì, aggiungete un backup locale — anche solo archiviare i dati per inviarli dopo, o una “modalità offline” di base. Se il sistema dipende da un unico cloud server, considerate ridondanza o almeno un piano per il downtime. Individuare i punti deboli ora vi permette di progettare mitigazioni: una piccola batteria di backup per il real-time clock, memoria per registrare i dati quando manca alimentazione o rete.
- Problemi normativi e di conformità: Un rischio architetturale spesso trascurato. Una data tecnologia wireless può richiedere la certificazione FCC/CE per le emissioni radio; certe bande di frequenza hanno restrizioni legali in alcuni paesi. L’uso sanitario o industriale porta i propri standard (regolamenti sui dispositivi medici, rating di sicurezza). Evidenziate ora le esigenze di conformità note così da potervi budgetare tempo e denaro. Un modulo cellulare può richiedere certificazioni dell’operatore, che richiedono tempo; LoRa in una data regione significa rispettare limiti di duty-cycle e potenza. Individuarle presto evita il “non possiamo spedire perché non abbiamo mai ottenuto la certificazione” in fase avanzata.
- Rischi di integrazione e complessità: Segnalate qualsiasi cosa tecnicamente rischiosa — una piattaforma IoT molto nuova, una libreria firmware sperimentale. Riconoscetela come rischio: pianificate un prototipo rapido o uno spike di ricerca per testarla, e tenete un fallback. La consapevolezza precoce di “cosa potrebbe andare storto” vi permette di eliminarlo in design o di preparare un piano B.
Un’analisi di rischi e costi nella Fase 2 significa entrare nello sviluppo con gli occhi aperti. Se la parte più rischiosa è un algoritmo di machine learning custom sul dispositivo, affrontatela per prima o monitoratela da vicino. Se il componente più costoso è un certo sensore, fate attenzione al budget altrove. Nessun prodotto è privo di rischi, ma la pianificazione proattiva è ciò che separa i progetti tranquilli dalle corse dell’ultimo minuto.
Documentare l’architettura chiaramente
Alla fine della fase di architettura, documentate l’architettura di sistema in modo che sia comprensibile e condivisibile per l’intero team. Questo documento diventa il progetto a cui tutti si riferiscono, quindi deve vivere in un posto accessibile — non chiuso nella testa del lead engineer.
Modi chiave per catturare e comunicare l’architettura:
- Diagrammi visuali: Mostrate il sistema da prospettive diverse. Un semplice block diagram (come sopra) copre il contesto ad alto livello dell’hardware e dei principali pezzi software. Alcuni team usano notazioni formali come SysML o il C4 model — opzionale, ma utile. Il punto è illustrare come hardware, firmware, servizi cloud e utenti interagiscono. Per il software (firmware del dispositivo e cloud), un diagramma dei componenti UML — o persino uno schizzo annotato — può mostrare quali moduli girano sul dispositivo rispetto al server. Non lasciatevi scoraggiare dagli acronimi: scatole etichettate e frecce in qualsiasi strumento comunicano bene. Usate lo stile che il vostro team legge meglio.
- Panoramica scritta: Accompagnate i diagrammi con una breve descrizione di ogni blocco e del suo ruolo: “MCU: responsabile della lettura del sensore e della cifratura dei dati”; “Cloud: responsabile dello storage dei dati, degli analytics e del fornire la REST API per l’app.” Qualche paragrafo o elenco puntato sotto il diagramma rimuove l’ambiguità.
- Bill of Materials (BOM) preliminare: Avviate un foglio di calcolo BOM di base che elenca i componenti chiave (sensore, MCU, modulo radio) con note su costo stimato, vendor e lead time o disponibilità. Non ogni resistore e condensatore — quelli arrivano nel design dettagliato — solo i pezzi principali, così che costo unitario e rischi di supply chain siano visibili. Se la BOM mostra il modulo wireless a 10 $ e tutto il resto a 2 $ complessivi, vedete subito dove conta l’ottimizzazione del costo. Se due componenti principali vengono dallo stesso fornitore, annotatelo — comodo, o un rischio.
- Notazione e coerenza: Con diverse persone che contribuiscono, concordate la nomenclatura. Se il diagramma dice “Device CPU”, gli altri documenti non dovrebbero alternare “microcontroller” e “CPU” a caso — l’incoerenza confonde. Mantenete le etichette coerenti e la documentazione sotto version control (un documento condiviso o una pagina wiki basta). Molti team raccolgono diagrammi e note in un breve Architecture Document che circola per feedback e serve da riferimento durante lo sviluppo.
L’obiettivo: qualsiasi membro del team — incluso un nuovo arrivato — può guardare l’architettura e mettersi in pari velocemente. Aiuta anche con gli stakeholder non tecnici: product manager o dirigenti potrebbero non leggere il vostro codice, ma possono leggere un diagramma ad alto livello. Una buona documentazione dell’architettura colma il divario tra idee e implementazione.
“Progetta due volte, costruisci una volta”: risparmiare tempo con la pianificazione iniziale
C’è un mantra in ingegneria: “progetta due volte, costruisci una volta.” Intercettare e risolvere i problemi in un design su carta costa molto meno che risolverli in un prodotto costruito — questa è l’intera filosofia della Fase 2. Spostare scatole e frecce in un diagramma fa molto meno male che rifare un PCB o riscrivere un modulo firmware perché il piano originale si è rivelato difettoso.
Usate questa fase per mettere l’intero team sulla stessa pagina presto. L’architettura è multidisciplinare: hardware engineer, firmware developer, cloud/backend engineer, product manager. Tutti dovrebbero avere voce nella review, quindi incoraggiate la discussione. Un cloud engineer potrebbe dire: “Se il dispositivo taggasse ogni lettura con un timestamp prima dell’invio, il mio lato server sarebbe più semplice” — una piccola richiesta, se la conoscete in anticipo. Un hardware designer potrebbe notare: “Ora usiamo due sensori, ma un terzo ci permetterebbe di misurare la qualità dell’aria — dovremmo lasciargli spazio?” Intuizioni come queste portano a piccoli aggiustamenti dell’architettura, o almeno a predisposizioni per espansioni future, che non emergono mai quando i team lavorano in isolamento. Appianare i punti di interfaccia ora batte il momento “non possiamo più cambiare questo” di dopo.
L’accuratezza qui costruisce fiducia. Alla fine della Fase 2 dovreste avere un progetto chiaro: un design di alto livello che mostra come intendete soddisfare i requisiti della Fase 1. Come il disegno architettonico di un edificio, non sceglie ancora i colori delle pareti o le maniglie — ma piani, porte, finestre e disposizione delle stanze sono decisi. In termini IoT: sapete quali sono i dispositivi, come si collegano, quali dati fluiscono dove e grosso modo quale tecnologia fa il lavoro.
Con quel progetto in mano, potete passare al design dettagliato e all’implementazione con fiducia. Avete creato una mappa per il viaggio IoT, quindi è molto meno probabile che vi perdiate. Nella Fase 3 e oltre — costruire hardware, scrivere codice — farete costantemente riferimento a questa architettura. E quando arriveranno i cambiamenti (arrivano sempre), aggiornate il documento di architettura così che resti un riferimento affidabile.
In sintesi: la Fase 2, Architettura di sistema, è dove preparate il progetto al successo. Allinea il team, espone i rischi presto e fornisce un piano chiaro. L’avete progettato — forse due volte — quindi ora potete costruirlo una volta, e costruirlo bene. Tenete il progetto vicino; sarà la vostra stella polare per il resto del viaggio.